

Before you begin
You’ll need:- A Sterndesk account.
- Access to a Sterndesk organization.
- A personal API key.
- A tool capable of making HTTP requests, such as cURL.
1. Create an API key
Sign in to Sterndesk and go to: Settings → My account → API Keys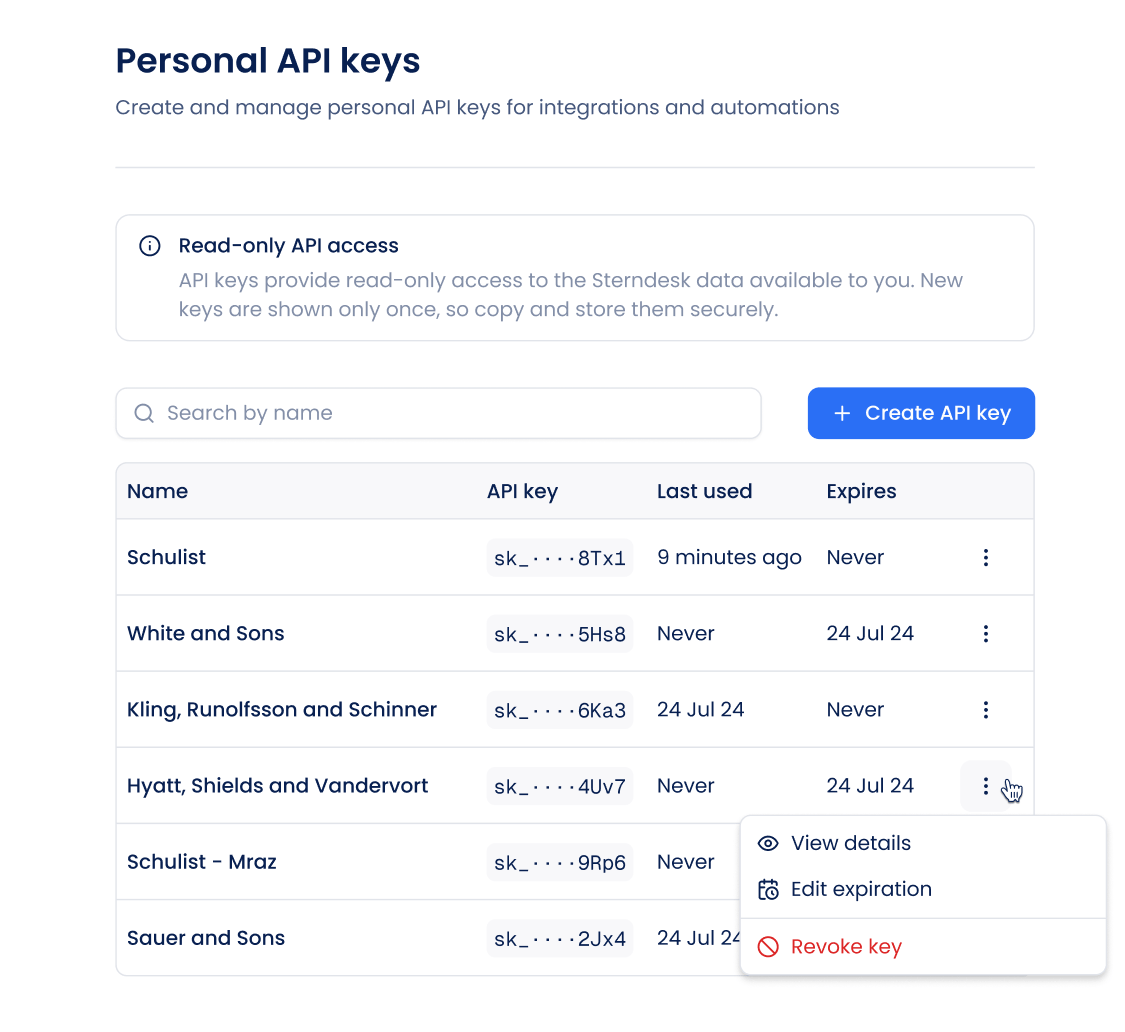
Important
Your API key is shown only once after creation. Copy and store it securely. You won’t be able to view the full key again.
Your API key is shown only once after creation. Copy and store it securely. You won’t be able to view the full key again.
2. Store your API key
For local development, you can store your API key in an environment variable:3. Make your first request
Use theWhoAmI operation to verify that your API key is working.
4. Explore the API
Sterndesk uses Connect RPC over HTTP/JSON. API operations are sent asPOST requests to paths under /rpc/.
Requests typically include:
Next steps
Now that you’ve made your first request, you can:- Explore available operations in the API Reference.
- Learn more about Authentication and API key permissions.
- Use the API Reference playground to test individual operations.
- Create separate API keys for different integrations or workflows when appropriate.